|
|||
| for Palm Powered Handhelds |
| by
|
| Home | Products | Support | Purchase | About | Contact | | ||||||||||
|
|||||||||||
Choosing a RouteThe sample data includes a route for you to try out. Go to the Options menu and choose Route. Select the route entitled Footes Bay to Rosseau. You're about to take a nautical tour through the lakes of Muskoka Canada!
You should see a red line on the map at Footes Bay. That is your route line. A route is a series of points connected together indicating a travel route. When navigating you'll follow this route to get to your destination. Simulating NavigationPathAway provides a nifty feature to animate your route before actually traveling. Under the GPS menu, Select Simulate. The travel simulation has begun. The simulator works just as if you are actually traveling. In fact, if you're following a recorded track, the simulator will display the actual speed and time. (See Following Tracks later on in this section). Watch the simulator until it stops at your destination, the town of Rosseau. Note: When you're actually connected to a GPS, you'll see a blue line indicating your line of travel. This is your recorded track. Each dot on the line represents a recorded point. Try running the simulator with the different views. Each view shows you a different set of interesting information. See Screen Views for details. Scrolling MapsMaps in PathAway can be larger than the screen, so scrolling maps is important. Besides scrolling automatically as you move, maps can be scrolled using your stylus in 2 ways.
2. Tapping and holding on the edges of the map will scroll the map towards the edge tapped on. Try it out. See if you can find the Joseph River on the map. Scroll the map by following the red route line. Tip. To quickly go to the start or end of your route, go to the Goto menu and select Goto Start of Route or Goto End of Route. Changing Map Layers.
A square Please note, moving between stacked maps should not be confused with map scaling where you zoom into or out of a single map by expanding or shrinking the map. PathAway does not scale maps at this time. (Memory and performance limitations on the Palm OS™ prohibit reasonable performance for map scaling at this time.)
|
|||||||||||||||||||||||||||||||||||||||||||||||||||||||||||||||||||||||||||||||||||||||||||||||||||||||||||||||||||||||||||||||||||||||||||||||||||||||||||||||||||||||||||||||||||||||||||||||||||||||||||||||||||||||||||||||||||||||||||||||||||||||||||||||||||||||||||||||||||||||||||||||||||||||||||||||||||||||||||||||||||||||||||||||||||||||||||||||||||||||||||||||||||||||||||||||||||||||||||||||||||||||||||||||||||||||||||||||||||||||||||||||||||||||||||||||||||||||||||||||||||||
 |
Full Screen Map View |
 |
Tracking View |
 |
Proximity View |
 |
Route View Shows the map and navigation data, plus full info for point proximity. As you approach a point, distance from, and course to, are displayed. Points in proximity are displayed by closest point. |

|
Point View |
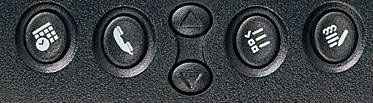
Tip. You can also traverse through the screens by pressing
the Phone Book hard key.![]()
PathAway works with or without maps. When used without maps, PathAway will display all points in a virtual Longitude and Latitude world. You can Zoom In and out to increase and decrease the Scale factor of your view. If you have points, routes, or Tracks defined, PathAway will display them on the screens. GPS connectivity works well with or without maps.
When navigating with maps, PathAway will center the map on your current location. When not connected to GPS, you can scroll the map to view different portions in the following 2 ways:
- Tapping and holding on the edges of the map will scroll the map in the direction towards the stylus. The map will continue to scroll until the stylus is released.
- Tapping and dragging will scroll the map in the direction you move the stylus.
PathAway supports any NMEA0183 v2.0 or higher compatible GPS device. This encompasses the majority of GPS devices on the market. Delorme Earthmate, and Tripmate proprietary protocols are also supported. A GPS is not required to use the software. A GPS device can be cable or infrared. Special serial cable can be purchased from GPS device manufacturer. Palm Powered™ device serial cable adapter can also be purchased separately. Some devices may come with the required cables for connecting to your Palm. See the section on GPS Sites for information and links to get your device attached to a GPS.
Current location on map is shown by the cross-hairs in the center of the map window or with an arrow showing direction of travel. When connected to a GPS , direction is shown by course required to reach the next point on route.
To navigate with your own maps, you need to convert and install them into PathAway using PathAway Tools - Map Manager. You can acquire maps from online web mapping sites, or scan them from paper maps, use digital pictures, or get maps from CD-ROM.
In order to use maps with a GPS, you need to calibrate them to their proper geographic (longitude/latitude) coordinates. This can be done in Map Manger by specifying the top-left and bottom-right coordinates of the map, or in PathAway using positions of known points. Refer to Calibrating Maps for more information.
Once calibrated, PathAway will center the map to your current location. As you move, the map is re-centered to show your position. If you are recording your track, you'll see a blue (or dark gray) line showing your line of travel on the map.
GPS Menu |
||
|
|
|
|
| Connect/Disconnect | Controls connection to GPS device. | |
| Simulate | Simulates a route by animating travel along the points of the route. | |
| Start New Trip... | Start a new trip. Options to start with a new track log, or continue current, and choose a new route to follow. | |
| End Trip | Clear the track log, reset odometer. Next connection will start with a new track log. | |
| Configure GPS... | Setup for GPS device. Choose device type. Confirm communications. | |
View Menu |
||
|
|
|
|
| Full Screen Map View | Shows Full Screen map view. | |
| Tracking View | Shows Tracking view. | |
| Proximity View | Shows Proximity view. | |
| Route View | Shows Route View. | |
| Point View | Shows Point View. | |
| Map Display... | Show options for Map Display. | |
| Show/Hide Dashboard | Turn Dashboard On/Off. | |
| Default Dashboard | Restores original Dashboard for current screen. | |
Options Menu |
||
|
|
|
|
| Routes... | Management of Routes. Shows list of routes. Options to Create new routes, rename, delete, edit route points, duplicate, join 2 routes together. Beam route to others. Select a route to display on the map. | |
| Tracks... | Management of Tracks. Shows list of recorded tracks. Options to rename, delete, edit track points, duplicate, join 2 tracks together. Beam tracks to others. Select a track to display on the map. | |
| Points... | Management of Points. Shows list of points. Options to Create new points, delete, edit individual points, Sort, find, and go to selected points on map. Beam points to others. | |
| Maps... | Management of Maps. Shows list of maps. Options to edit map location details, Display map, delete maps, beam maps to others. | |
| Preferences... | Settings for options such as units of display, track recording options, map display options, time estimation settings, alarm settings, and GPS configuration. | |
| Calibrate Map... | Adjust map location coordinates by selecting 2 known points on the map. Map location is adjusted by distances between the two points, by nudge controls, or by setting the top-left and bottom right longitude and latitude coordinates. | |
| About PathAway... | Information about PathAway. Registration key entry. | |
Goto Menu |
||
|
|
|
|
| Go to Start/End of Route | Moves location to the start or end of the active route. | |
| Go to Start/End of Track | Moves location to the start or end of the active recorded track. | |
Tapping on PathAway screen brings up a context menu depending on the item selected. Tapping on the map brings up the Map Context menu. Tapping on a dashboard item brings up the Dashboard menu options.
Tapping on the map brings up a context sensitive menu. Tapping on an existing point will display its name and a menu of options. Tapping on another location on the map will bring up a menu allowing you to create points, add to a route, center the map, or zoom in or out.
 |
| Name | Description | Action |
| Add Point | Adds the selected location to the Points database. Calls up Edit Point dialog for naming and selecting icon. | No point selected. |
| Add Route Pt | Adds selected location to the route. | Active Route, and location not on route. |
| Edit... | Displays the Point Edit dialog for the selected point. | Point selected. |
| Adjust Location | Allows adjusting the location of the selected point by tapping it's proper position on the map. | Point selected. |
| Delete Point | Deletes the selected point from the Points database. | Point selected. |
| Delete fm Route | Removes the specific point selected from the active route. Point remains in point database if there already. | Route Point selected. |
| Center Map | Centers map at selected location. | For all Taps. |
| Zoom In | Zooms into selected location. | For all Taps. |
| Zoom Out | Center map and Zoom out. | For all Taps. |
Please note, moving between stacked maps should not be confused with map scaling where you zoom into or out of a single map by expanding or shrinking the map. PathAway does not scale maps at this time. (Memory and performance limitations on the Palm OS™ prohibit reasonable performance for map scaling at this time.)
 |
 |
 |
| Name | Description |
| Hide | Removes the currently selected info from the selected Dashboard. |
| Heading |
Shows current Heading (course) direction. |
| Elevation |
Shows current Elevation. |
| Speed |
Shows current rate of speed. |
| Location |
Shows current longitude/latitude position. |
| Time |
Current Time. Palm OS™ Time when not connected to GPS. GPS UTC + time zone offset when connected to GPS. |
| View Range |
Map View range distance. Horizontal distance from left to right side of screen. |
| Trip Dist (odo) |
Distance traveled since start of Trip (first GPS fix). |
| Elapsed Time |
Elapsed time in minutes since start of Trip (first GPS fix). |
| Average Speed |
Average speed since start of trip. |
| Max Speed |
Maximum speed obtained. |
| Time to Dest (ete) |
Estimated amount of time to reach destination. Available only if following a Route. |
| Arrival Time (eta) |
Estimated time of Arrival at destination. Available only if following a Route. |
| Dist to Dest (dtd) |
Distance to destination along route. Available only if following a Route. |
| Follow Heading |
Follow this course to reach next leg point. Available only if following a Route. |
| Dist to Next Point |
Distance to next leg. Available only if following a Route. |
| Off Track Warning |
Displays distance and position off the route track. Available only if following a Route. |
| Heading Direct to Dest |
Displays the heading direct to the route destination point. Available only if following a Route. |
| Dist Direct to Dest |
Displays the straight line distance direct to the route destination point. Available only if following a Route. |
| Heading on Next Leg |
Heading to follow after next point in route is reached. Available only if following a Route. |
| Dist of Next Leg |
Distance to next point after next point. Available only if following a Route. |
| Turn Instructions |
Display Right-Left turn instructions. Activates when next point is defined as an Intersection. Available only if following a Route. |
| Battery Status | Battery charge status expressed as a percentage %. |
| Set Font... | Set the primary font for the currently selected item. |
All of the screens contain a customizable dashboard. Each screen has a dashboard setup associated with it. Here is how to customize the dashboard.
To Hide the Dashboard, choose the main menu select View, then
Hide Dashboard. The screen will look similar to the this:

Hide the Dashboard for large screen map viewing
Choose the View menu option Show Dashboard to turn the dashboard back on.
To adjust individual dashboard items, simply tap the item you would
like to customize. The Dashboard Options menu
will appear showing the currently selected item and the options
to available to set for the dashboard.
|
|
|
When there is no active information available for a dashboard control item, or the dashboard item is hidden, only a bar will be displayed. Clicking on one of the bars will bring up the dashboard menu.
| Main Menu Bar. Turns to hourglass when drawing screen. | |
| Connect/Disconnect GPS. When connected to GPS, turns to a Lock icon when a GPS fix is obtained. Vertical bars shows # of satellites fixed on. Short dots indicate # of satellites in view. | |
 |
Add Point at location. |
 |
Toggle proximity alarm on/off. |
| Show full map view. | |
 |
Zoom Out - no Map. |
| Zoom In - no Map. | |
| Zoom Out - to another Map. | |
| Zoom In - to another Map. |
Please note, moving between stacked maps should not be confused with map scaling where you zoom into or out of a single map by expanding or shrinking the map. PathAway does not scale maps at this time. (Memory and performance limitations on the Palm OS™ prohibit reasonable performance for map scaling at this time.)
|
Add |
Cycle Screen Views |
Zoom |
Databases |
Connect/ Disconnect GPS |
 |
||||
Note some hard keys can also be used to press OK from a dialog.
New Trip Dialog OK key = Connect GPS hard key.
Edit Point OK key = Add Point button.
GPS MenuOptions from the GPS menu bar. |
|||||||||||||||||||||||||||||||||||||
Start New Trip...Easy selecting of route and track recording log. |
|||||||||||||||||||||||||||||||||||||

|
Follow Route: Record to Track Log: Tip: This dialog is launched when you first connect
to the GPS. If you've connected using the Memo hard
key, |
||||||||||||||||||||||||||||||||||||
GPS ConfigureSetup for GPS device. Watch GPS input stream to ensure communications is working properly. |
|||||||||||||||||||||||||||||||||||||
 |
Device Protocol: This is the method that your GPS device uses for communicating with other devices. Choose your type of GPS device, or specify it's communications protocol. NMEA is the most common protocol for serial communications in use today. NMEA stands for National Marine Electronics Association. PathAway supports version 2.0 or higher of NMEA-0183. Check your device for specifications on interfacing with other devices. Some devices have multiple interfaces that can be set. Ensure that NMEA-0183 is set as the active communications interface. Port: Baud Rate: The most common baud rate for most GPS devices is 4800 BPS. Next is 9600, followed by 57,600. Parity, Bits, Stop bits: Log GPS input: Note: If your Palm User name is "Charlie Patterson" and your Palm folder is in C:\Palm, your Backup folder can be found at "C:\Palm\PatterC\Backup". Connect: |
||||||||||||||||||||||||||||||||||||
View Menu Dialogs |
|||||||||||||||||||||||||||||||||||||
Map Display OptionsControl what layers are displayed on the maps. |
|||||||||||||||||||||||||||||||||||||
 |
Show Maps: Auto Select Maps: User Gray for 4-bit maps: Show Tracks: Show All Tracks: Show Points: Show Icons: Show Text Labels: Highlight Closest Point: |
||||||||||||||||||||||||||||||||||||
Options Menu Dialogs |
|||||||||||||||||||||||||||||||||||||
Options-RoutesRoute management dialog. Lists all of your routes. You can create new routes, edit a route, or choose an existing route to follow forward or reverse. |
|||||||||||||||||||||||||||||||||||||
 |
Select Route to follow by highlighting a route in the list. Choose None for no Route. New: Edit Points... Details... |
||||||||||||||||||||||||||||||||||||
Routes Dialog Menus |
|||||||||||||||||||||||||||||||||||||
|
|
|
||||||||||||||||||||||||||||||||||||
Route Details (Database Info) |
|||||||||||||||||||||||||||||||||||||
 |
For modifying the details of the route, such as name, transportation
mode, and individual points. Add Points... Route points can also be added from the map view by selecting a point on the map and selecting "Add to Route" from the menu. Edit Points... |
||||||||||||||||||||||||||||||||||||
 |
Mode of Transportation: Select the transportation mode from the list. Icons can be created using PathAway Icon Manager. |
||||||||||||||||||||||||||||||||||||
Options-TracksLists of your recorded tracks. Choose a track to follow for pinpoint accurate routing. |
|||||||||||||||||||||||||||||||||||||
 |
Manage your tracks by duplicating or joining tracks, and transfer between Garmin GPS devices. Follow: Show Edit Points... OK, Cancel Details... |
||||||||||||||||||||||||||||||||||||
Tracks Dialog Menus |
|||||||||||||||||||||||||||||||||||||
|
|
|
||||||||||||||||||||||||||||||||||||
Options-PointsLists all points. Points may be stored in multiple databases. Select a point to "Goto" on the map, edit point information, delete, add new points. |
|||||||||||||||||||||||||||||||||||||
 |
Point Databases Drop-down List New: Up - Down Arrows Add to Route OK Show Add... Edit...
|
||||||||||||||||||||||||||||||||||||
Points Dialog Menus |
|||||||||||||||||||||||||||||||||||||
|
|
|
||||||||||||||||||||||||||||||||||||
Point DetailsEdit point name, geographic location, description, and choose an icon to represent the point on the map. |
|||||||||||||||||||||||||||||||||||||
 |
Name: Note: Longitude/Latitude: Elevation: Show on Map: Add to Route: |
||||||||||||||||||||||||||||||||||||
 |
Point Icon Drop-down list: See Icon Manager for details on how to import your own points. |
||||||||||||||||||||||||||||||||||||
Options-Points-Edit DatabasesLists of your points databases, Choose a point database to make the active database for which new points will be added to. |
|||||||||||||||||||||||||||||||||||||
Points Database |
Manage point databases by duplicating or joining databases, move to and from expansion cards, beam to others, and transfer between Garmin GPS devices. New Edit Points... OK, Cancel Details... |
||||||||||||||||||||||||||||||||||||
Point Database Dialog Menus |
|||||||||||||||||||||||||||||||||||||
|
|
|
||||||||||||||||||||||||||||||||||||
Options-Tracks/Routes/Points-Get From GPS DeviceFor acquiring data from Garmin GPS devices. |
|||||||||||||||||||||||||||||||||||||
 |
Routes: Tracks: Points: |
||||||||||||||||||||||||||||||||||||
Options-Tracks/Routes/Points-Send To GPS DeviceFor sending data to Garmin GPS devices. |
|||||||||||||||||||||||||||||||||||||
 |
Routes: Tracks: Points: |
||||||||||||||||||||||||||||||||||||
Options-MapsLists all loaded maps. Choose display to show the map on-screen. Transfer maps between memory expansion cards. |
|||||||||||||||||||||||||||||||||||||
Maps |
Show Cancel Delete Details...
|
||||||||||||||||||||||||||||||||||||
Map Dialog Menus |
|||||||||||||||||||||||||||||||||||||
 |
|
||||||||||||||||||||||||||||||||||||
Map Details |
Edit map information such as name, and geographical coordinates. See Entering Longitude/Latitude coordinates for specifying the top- left and bottom-right coordinates of the map.
|
||||||||||||||||||||||||||||||||||||
Move To/From Expansion CardsFrom the a track/route/point or map database dialog. Select the Move to... menu option. |
|||||||||||||||||||||||||||||||||||||
 |
Move or copy (Duplicate) database to and from expansion card. Select database to copy or move before selecting Database-Move
To... menu. |
||||||||||||||||||||||||||||||||||||
Options-Calibrate MapOnce maps have been transferred to the device, you can fine-tune the map coordinates by matching the positions of known points on the maps, with the actual position displayed by the map. Resolution, and offset of the map is adjusted. Or the map database can be edited and the top-eft - bottom-right coordinates of the map can be manually edited. First you should select the map you are going to calibrate. If the map to calibrate is not visible, go to the Options-Maps dialog, and choose the map by it's name, and tap the Show button. To calibrate the map, select the Options-Calibrate Map menu options. You will be shown a dialog with calibration options. |
|||||||||||||||||||||||||||||||||||||

|
Calibrate by known points
The easiest way to calibrate a map is to simply choose two points where their geographical location (longitude-latitude) is already known. These may be points you've already captured using your GPS. Calibrate using Nudge Controls Calibrate Manually |
||||||||||||||||||||||||||||||||||||
Calibrate by known points
|
|||||||||||||||||||||||||||||||||||||
Calibrate using Nudge ControlsWhen the option for calibrating using Nudge controls is selected,
the nudge control screen is shown. Nudge moves adjusting the calibration of the map by geographical coordinates. This amount of adjustment is set by the nudge factor. The nudge factor is set in decimal degrees. This screen contains a number of buttons for adjusting the
coordinates of the map. As well, a nudge factor can be set
for adjusting the precision to which to move the map.
Note if the geographical width is not exactly the same as the height, then the map sizing movement will appear to be of different values horizontally and vertically, since the pixel coverage of a nautical mile (degree lat or lon) is different between width and height. |
|||||||||||||||||||||||||||||||||||||
Calibrate manuallySet the top-left and bottom-right geographical (longitude-latitude)
coordinates of the map. |
|||||||||||||||||||||||||||||||||||||
Options-PreferencesSettings for options such as units of display, track recording options, map display options, time estimation settings, and GPS configuration. |
|||||||||||||||||||||||||||||||||||||
Preferences - General |
|||||||||||||||||||||||||||||||||||||
 |
Distance, Elevation, Volume, Course, Position: Point Naming: Stay on when Connected:
|
||||||||||||||||||||||||||||||||||||
Preferences - TrackingSet track recording preferences. |
|||||||||||||||||||||||||||||||||||||
 |
Record Track History: Track Data Size: Track Precision: On Track when within: In Proximity when within: |
||||||||||||||||||||||||||||||||||||
Preferences - Time EstimationControl how time-based estimates are calculated. |
|||||||||||||||||||||||||||||||||||||
Preferences  |
Time Estimates based on: Average Speed: Estimates based on current average speed. Current Speed: Estimates based on current speed.
Custom Speed: Base time estimates on the specified average speed. Local time offset: Add or subtract time extracted from GPS (Greenwich mean time). GPS calculates Speed/Course: When On, use the speed reported by the GPS device as the current speed and course. When off, PathAway will calculate the current speed and course. This option is provide because some GPS devices report course and or speed incorrectly. |
||||||||||||||||||||||||||||||||||||
Preferences - Configure GPSPreferences - Map Display |
|||||||||||||||||||||||||||||||||||||
Preferences - AlarmsHave audible alarms sound when you reach points of interest, or get off your route track. Set the distance threshold for the proximity point, and choose from one of the predefined alarm sounds. |
|||||||||||||||||||||||||||||||||||||
|
Preferences |
All Alarms Off Track Proximity 1 and 2 Turn 1 and 2 |
||||||||||||||||||||||||||||||||||||
The geographical coordinates are specified vertical distance from the equator known as latitude, and horizontal distance from the Central meridian over Greenwich England, known as longitude. These coordinates are entered in one of three available formats: Hemisphere-Degrees-minutes, Hemisphere-Degrees-minutes-seconds, and decimal degrees. Latitude coordinates north of the equator are prefixed by 'N' or a positive number. Coordinates in the southern hemisphere are prefixed by 'S' or negative numbers.
Examples:
Hemisphere-Degrees-minutes:
N45 30.500, W79 30.500
* must be a space between degrees and minutes.
Hemisphere-Degrees-minutes-seconds:
N45 30 30.0, W79 30 30
* must be a space between degrees, minutes, and seconds.
Decimal degrees
45.505, -79.505
Installing
Install PathAway Tools on your Windows PC, by running the Install program PWTools.exe
Use the Map Manager to prepare maps for PathAway. The application is quite simple and straight forward. To prepare a map follow these steps:
Ensure the map is in either Jpeg or BMP format.
Run the Map Manager.
To import a map, choose from the menu Map-Import Map. Select your map from the dialog.
The Map Manager will convert the image into the format necessary
to display in PathAway.
Next, give the map a name, and set its color depth. The color depth must at least match your device's. Most Palm Powered™ devices support color depths that are equal to or less than the maximum available on the device. I.e. if your Palm Powered™ device supports up to 256 colors, then, 4-bit gray-scale maps will work.
You can enter the longitude and latitude coordinates at this time, if you know them. If not, it is sometimes easier to match them up to known geographical points. This is done once the maps are transferred on the Palm Powered™ device. (See section on Calibrating Maps).
The position coordinates can be specified by one of the following methods:
1) By top-left and bottom right or,
2) By the map center coordinates, and the total distance covered by the map. Total distance is in statute miles. To convert from nautical miles to statute miles, multiply nautical miles by 1.151. For Kilometers to Miles, multiply kilometers by 0.621
When you're done, save the map by selecting File-Save Map As. You will be prompted to save it with a .prc extension. You can also send the map directly to your HotSync folder by selecting File-Send Map to HotSync. Then, simply press the HotSync button to install the map on the Palm Powered™ device.
The Icon Manager allows you to create your own custom icons to represent Points, or mode of transportation icons.
If you haven't done so, download onto your PC, the sample icon and vehicle databases from the Download Optional Components page.
Once done, open up the Icon.prc file from the File-Open dialog. You'll see the list of icons already in the database. Each name for an icon must be followed by a ",P" (comma P). This is an indicator to PathAway that the image is a Point Icon. Similarly ",V" (comma V) indicates a vehicle icon.
Create your own icon using an application such as Windows Paint. Create an image no larger than 24 pixels wide by 14 pixels high. The average is 11x11. Save the file as a .BMP, or Jpeg.
Then, in the icon manager, choose Image-Add Image, and select the icon you just created.
That's it, now save the file, or send it to HotSync®. You're ready to use your new icon as a point.
|
|
|||||
|
Copyright © 2001-2004 MuskokaTech.
|
|||||
 to start the application.
 Press
OK to return to the main screen.
Press
OK to return to the main screen. 1.
Tap and drag a point on the map to drag the map around. Release
the stylus when you've reached the position you would like to view.
1.
Tap and drag a point on the map to drag the map around. Release
the stylus when you've reached the position you would like to view. The
samples come with a few different resolutions of maps. These maps
are layered on top of each other. The
The
samples come with a few different resolutions of maps. These maps
are layered on top of each other. The  Capturing
Points on a Map
Capturing
Points on a Map icon to connect and disconnect
from the GPS.
icon to connect and disconnect
from the GPS.


 Adjusts the map towards the corresponding
direction by the given factor (nudge).
Adjusts the map towards the corresponding
direction by the given factor (nudge). Adjusts the map in both directions
horizontally or vertically by the given factor.
Adjusts the map in both directions
horizontally or vertically by the given factor. Adjusts the map in both directions
equally horizontally and vertically by the given factor. Effect
is to make the map appear to cover a larger or smaller geographical
space.
Adjusts the map in both directions
equally horizontally and vertically by the given factor. Effect
is to make the map appear to cover a larger or smaller geographical
space.